Complete Guide: How to Install Linux, NGINX, MariaDB, & PHP (LEMP Stack) on Ubuntu 22.04 Server
 on Ubuntu 22.04 Server 1")
Are you looking to set up a high-performance web server for your web development projects? If so, you’ll need to install the LEMP stack – a powerful web development platform consisting of Linux, NGINX, MariaDB(MySQL), and PHP. In this complete guide, I’ll walk you through the steps of installing each component of the LEMP stack on your server, even if you’re a beginner. By the end of this guide, you’ll have a fully functional web server ready to deploy your web applications. So, let’s get started!
Before we begin with the installation of the LEMP stack, there are a few prerequisites that you need to have in place:
- A server with a Linux operating system installed – Ubuntu is a popular choice for web servers. In this tutorial, I use Digital Ocean Droplets with Ubuntu 22.04 Operating System running.
- Root or sudo access to the server.
- A stable internet connection.
- Basic command-line knowledge. I use Bitvise for the connection, file transfer, and logging in to the Digital Ocean Droplet Server.
It’s essential to ensure that you have all these prerequisites before starting the installation process. But suppose you don’t have a Digital Ocean account. In that case, you can use another server or VPS as long as the Operating System you use is Ubuntu, so you can easily follow what I will do throughout this tutorial. With these prerequisites in place, you’re ready to move on to the next step.
Open your remote access software
Bitvise is my favorite tool for remote access to my web server because it allows me to transfer and use a Terminal connection to the web server.
 on Ubuntu 22.04 Server 2")
Click on “New Terminal Console” to access the server and install NGINX, MySQL, PHP, and other components needed to run and use the webserver.
 on Ubuntu 22.04 Server 3")
Remember to keep this “New SFTP Window” open since we’ll use it to transfer files from the local computer to the live web server.
 on Ubuntu 22.04 Server 4")
After you click on “New Terminal Console,” the bitvise terminal console will appear, as seen in the figure below.
 on Ubuntu 22.04 Server 5")
Step 1 – Update and Upgrade Ubuntu Server
Nginx is a popular high-performance web server these days. It can also function as a reverse proxy and cache server.
We will use the APT package manager to install this software.
To install the Nginx Web server, use the following command.
The sudo apt-get update command is used to download package information from all configured sources.
sudo apt update on Ubuntu 22.04 Server 6")
The sudo apt upgrade command downloads and installs the updates for each outdated package and dependency on your system.
sudo apt upgrade on Ubuntu 22.04 Server 7")
In my actual terminal console code, there is no sudo because I am logged in as the root user.
Click “Yes” to continue.
 on Ubuntu 22.04 Server 8")
Click “Ok” or Press “Enter” to “Keep the local version currently installed.”
 on Ubuntu 22.04 Server 9")
Click “Ok” or Press “Enter”
 on Ubuntu 22.04 Server 10")
Click “Ok” or Press “Enter”
 on Ubuntu 22.04 Server 11")
If the upgrade is done, it will look like the image below.
 on Ubuntu 22.04 Server 12")
Step 2 – Installing the NGINX Web Server
Nginx is an open-source web server used for reverse proxy, caching, load balancing, and other web-related tasks. It is known for its high performance and low resource usage. NGINX can be used as a web server, reverse proxy, or load balancer. Nginx is very fast and can handle high traffic and complex requests, making it an excellent choice for modern web applications.
Before we install NGINX, I’ll show you how to check if it is already installed.
To check NGINX, run the command below.
nginx --version on Ubuntu 22.04 Server 13")
To install the Nginx Web server, enter the following command into the terminal.
sudo apt install nginx on Ubuntu 22.04 Server 14")
Type “Y” and press enter to continue the installation.
 on Ubuntu 22.04 Server 15")
Click “Ok” or Press “Enter”
 on Ubuntu 22.04 Server 16")
If the installation is done, it will look like the image below.
 on Ubuntu 22.04 Server 17")
To recheck NGINX, run the command below.
 on Ubuntu 22.04 Server 18")
After installing it, we can allow NGINX to start automatically at boot time by performing the following command.
sudo systemctl enable nginxThen start NGINX with this command.
sudo systemctl start nginxNow check out NGINX status.
sudo systemctl status nginxPress “Q” on your keyboard to exit the NGINX status display.
 on Ubuntu 22.04 Server 19")
Now type in the public IP address of your Ubuntu 22.04 server in the browser address bar. You should see the “Welcome to Nginx” Web page, which means the NGINX Web server is running correctly. If you are installing LEMP on your local computer, type 127.0.0.1 or localhost in the browser address bar.
 on Ubuntu 22.04 Server 20")
Step 2 – Install MariaDB Database Server
MariaDB is a popular open-source relational database management system (RDBMS) that is a community-driven fork of the MySQL database management system. The original developers of MySQL created it in response to concerns about the acquisition of MySQL by Oracle Corporation.
MariaDB offers improvements over MySQL, including improved performance, new features, and enhanced scalability. In addition, it is fully compatible with MySQL, which means that applications written for MySQL can also be used with MariaDB without any modifications. As a result, MariaDB is widely used for web applications, data warehousing, business intelligence, and other purposes. It is available on various platforms, including Linux, macOS, and Windows.
sudo apt install mariadb-server mariadb-clientType “Y” and press enter to continue the installation
 on Ubuntu 22.04 Server 21")
Press Enter to continue.
 on Ubuntu 22.04 Server 22")
Press Enter to continue.
 on Ubuntu 22.04 Server 23")
After it’s installed, the MariaDB server should be automatically started. Use systemctl to check its status.
systemctl status mariadbPress “Q” on your keyboard to exit the MariaDB status display.
 on Ubuntu 22.04 Server 24")
If MariaDB is not running, start it with this command
sudo systemctl start mariadbTo enable MariaDB to automatically start at boot time, run
sudo systemctl enable mariadbNow run the post-installation security script.
sudo mysql_secure_installationWhen prompted to provide the MariaDB root password, press Enter because the root password has not yet been set up. Then press y to set the MariaDB server’s root password.
Press Enter for none.
 on Ubuntu 22.04 Server 25")
Then, click Enter to answer all of the remaining questions, which will deactivate the anonymous user, disable remote root login, and delete the test database. This is a fundamental requirement for MariaDB database security. (The capitalization of Y indicates that it is the default answer.)
Switch to unix_socket authentication [Y/n]Type “n”
 on Ubuntu 22.04 Server 26")
change the root password? [Y/n]Type “Y”
Type your new password
 on Ubuntu 22.04 Server 27")
Remove anonymous users? [Y/n]Press Enter.
Disallow root login remotely? [Y/n]Press Enter.
Remove test database and access to it? [Y/n]Press Enter.
Reload privilage tables now? [Y/n]Press Enter.
Now it is done
 on Ubuntu 22.04 Server 28")
By default, the MaraiDB package on Ubuntu utilizes unix_socket to authenticate user login, which means you can log into the MariaDB console using the OS’s username and password. Using the following command to log in without providing the MariaDB root password.
sudo mariadb -u root on Ubuntu 22.04 Server 29")
To exit the MariaDB console, type this command.
exit;Check the MariaDB server version information.
mariadb --versionAs you can see, I have installed MariaDB 10.6.11.
 on Ubuntu 22.04 Server 30")
Step 3 – Installing PHP (php8.1-fpm)
NGINX is used to provide content, whereas MariaDB (MySQL) is used to store and manage data. Now that PHP is installed, you may use it to process code and generate dynamic content for the web server.
Unlike Apache, which embeds the PHP interpreter in each request, Nginx requires additional software to conduct PHP processing and serve as a bridge between the PHP interpreter and the web server. This improves overall efficiency in most PHP-based websites but necessitates additional settings. To inform Nginx to pass PHP requests to this program for processing, you’ll need to install php8.1-fpm, which stands for “PHP FastCGI process manager” and uses the current version of PHP (at the time of writing). You’ll also need php-mysql, a PHP package that allows PHP to interface with MySQL databases. As dependencies, core PHP packages will be installed automatically.
To install the php8.1-fpm and php-mysql packages, run
sudo apt install php8.1-fpm php-mysqlInstalling these PHP extensions ensures that your CMS runs smoothly. Now start php8.1-fpm.
sudo systemctl start php8.1-fpmEnable auto-start at boot time
sudo systemctl enable php8.1-fpmCheck PHP 8.1 status
systemctl status php8.1-fpmPress “Q” on your keyboard to exit the PHP status display.
 on Ubuntu 22.04 Server 31")
Step 5 – Create an Nginx Server Block with the PHP Processor
NGINX is a popular web server that can serve static and dynamic content on the internet. It is known for its speed, scalability, and reliability. NGINX uses a modular architecture, which can be customized to suit different use cases and configurations.
In NGINX, a server block is a configuration section that defines how NGINX should handle requests for a specific domain or IP address. In addition, each server block can contain multiple location blocks, which define how NGINX should handle requests for specific URLs within that domain or IP address.
When configuring NGINX to work with PHP, there are a few key things to consider. First, you must ensure that the PHP interpreter is installed on the server and configured to work with NGINX. This can be done using various methods, including FastCGI or PHP-FPM.
Once the PHP interpreter is installed and configured, you can create a server block in NGINX that points to your PHP application. This server block will typically contain directives that tell NGINX how to handle requests for PHP files, including setting the root directory for your application, defining the PHP handler, and specifying any necessary environment variables.
In this tutorial, I’ll use webforten.com as an example domain name.
For example, a basic server block for a PHP application might look something like this:
server {

    listen 80;
	listen [::]:80;

	root /var/www/webforten;

	# Add index.php to the list if you are using PHP
	index index.html index.htm index.nginx-debian.html;

	server_name webforten.com www.webforten.com;

	location / {
		# First attempt to serve request as file, then
		# as directory, then fall back to displaying a 404.
		try_files $uri $uri/ =404;
	}

	# pass PHP scripts to FastCGI server
	#
	location ~ \.php$ {
		#include snippets/fastcgi-php.conf;

        include snippets/fastcgi-php.conf;
        fastcgi_pass unix:/var/run/php/php8.1-fpm.sock;

	}

	location ~ /\.ht {
		deny all;
	}
}
NGINX is enabled by default on Ubuntu 22.04 and is configured to serve content from the /var/www/html directory. While this is OK for a single site, it might be challenging to manage if you host multiple websites. Rather than changing /var/www/html, we’ll create a directory structure within /var/www for the webforten website, keeping /var/www/html as the default directory to be served if a client request does not match any other sites.
Create the root web directory for *webforten as follows.
* Replace it with the name of your choice
sudo mkdir /var/www/webfortenThen, open a new configuration file in Nginx’s sites-available directory using your preferred command-line editor. Here, we’ll use “nano” or the “New SFTP Window” I mentioned earlier, which I’ll use to transfer files from the computer to the web server.
If you want to use the “nano” command, you will do it like this.
sudo nano /etc/nginx/sites-available/webfortenBut because I want to use bitvise “New SFTP Window” I need to open it, as you can see in the screenshot below.
 on Ubuntu 22.04 Server 32")
This is the look when bitvise SFTP opens.
 on Ubuntu 22.04 Server 33")
Go to this directory
/etc/nginx/sites-available/ and transfer the file to the “webforten” NGINX Server block inside “sites-available” directory
 on Ubuntu 22.04 Server 34")
this is the “webforten” server block code below.
server {

    listen 80;
	listen [::]:80;

	root /var/www/webforten;

	# Add index.php to the list if you are using PHP
	index index.html index.htm index.nginx-debian.html;

	server_name webforten.com www.webforten.com;

	location / {
		# First attempt to serve request as file, then
		# as directory, then fall back to displaying a 404.
		try_files $uri $uri/ =404;
	}

	# pass PHP scripts to FastCGI server
	#
	location ~ \.php$ {
		#include snippets/fastcgi-php.conf;

        include snippets/fastcgi-php.conf;
        fastcgi_pass unix:/var/run/php/php8.1-fpm.sock;

	}

	location ~ /\.ht {
		deny all;
	}
}
Now see the directory sites-available directory.
Activate the configuration by linking to the configuration file from NGINX’s sites-enabled directory:
sudo ln -s /etc/nginx/sites-available/webforten /etc/nginx/sites-enabled/Then, unlink the default configuration file from the /sites-enabled/ directory:
sudo unlink /etc/nginx/sites-enabled/default Note: If you ever need to restore the default settings, recreate the symbolic link, as shown below:
sudo ln -s /etc/nginx/sites-available/default /etc/nginx/sites-enabled/This instructs Nginx to execute the configuration at the next reload. Do the following to check your configuration for syntax errors:
sudo nginx -t on Ubuntu 22.04 Server 35")
If errors are reported, return to your configuration file and review its contents before proceeding.
When ready, reload Nginx to apply the changes:
sudo systemctl reload nginxThe new website configuration is now active, but the directory of webroot /var/www/webforten is still empty. Create any HTML or PHP file inside this directory, but in the example, I will use an index.html file in that directory so we can test that our new server block works as expected:
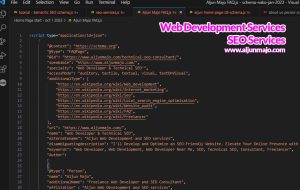
The content of index.html is the code seen below
<html>
  <head>
    <title>Your Friendly Web Developer with SEO Skills</title>
  </head>
  <body>
    <h1>Please Follow My Facebook Group</h1>
    <h2>SEO & Web Development Tutorials Philippines</h2>

    <p>You can also go to this Address to get to my Facebook Group</p>
    <p><strong>www.https://www.aljunmajo.com/wp-content/uploads/2023/02/WordPress-Speed-Optimization-Made-Easy-PageSpeed-Insights-Google-Core-Web-Vitals-1.jpgmajo.com/fb-group/</strong>.</p>
  </body>
</html>
Upload or add the index.html inside this directory /var/www/webforten
 on Ubuntu 22.04 Server 36")
Now, open your browser and navigate to your server’s domain name or IP address, as specified by the server_name directive in the server block configuration file:
http://server_domain_or_SERVER_IP_ADDRESSYou will see something like this:
 on Ubuntu 22.04 Server 37")
If you see the page above, it signifies your NGINX server block is functioning normally.
Your LEMP stack is now fully functional. The next step is to write a PHP script to verify that Nginx can handle.php files within your newly configured website.
Step 5 – Testing PHP with NGINX
Your LEMP stack should now be properly configured. You can test it to ensure that NGINX can appropriately handle “.php” files to your PHP processor.
You can generate a test PHP file in your document root or inside this directory “/var/www/webforten.” In your favorite text editor, create a new file called “test.php” in your document root:
In this directory /var/www/your_domain/ add test.php file
The content of test.php is the code seen below
<?php
phpinfo(); on Ubuntu 22.04 Server 38")
When you are finished, upload the test.php file to the web server directory /var/www/webforten.
You can now access this page in your web browser by visiting the domain name or public IP address you’ve set up in your Nginx configuration file, followed by IP_ADDRESSS/test.php:
http://server_domain_or_SERVER_IP_ADDRESS/test.phpYou will get a web page with complete information about your server
 on Ubuntu 22.04 Server 39")
Please see my other tutorial on installing WordPress with Nginx, MariaDB, and PHP8.1 on Ubuntu 22.04 Server – (LEMP).
Congratulations! You have successfully installed the LEMP stack on your server. With Linux, Nginx, MySQL, and PHP installed, you have a powerful web development platform at your fingertips. Remember to update and secure your software by regularly applying updates and patches. It’s also a good idea to familiarize yourself with the configuration files for each component of the LEMP stack, as this will allow you to customize your server to your specific needs. Then, with your high-performance web server up and running, you’re ready to build and deploy your web applications. Happy coding!