How to add custom CSS styles for wpforms plugin on your WordPress website
If you’d prefer to watch a short tutorial video, you can do so below.
(to be updated for a youtube video – How to add custom styles for WPForms plugin)
The WPForms plugin allows users to create forms easily using drag & drop functionality. It has many features like a captcha, validation, email confirmation, etc. You can customize the look and feel of the form fields using CSS.
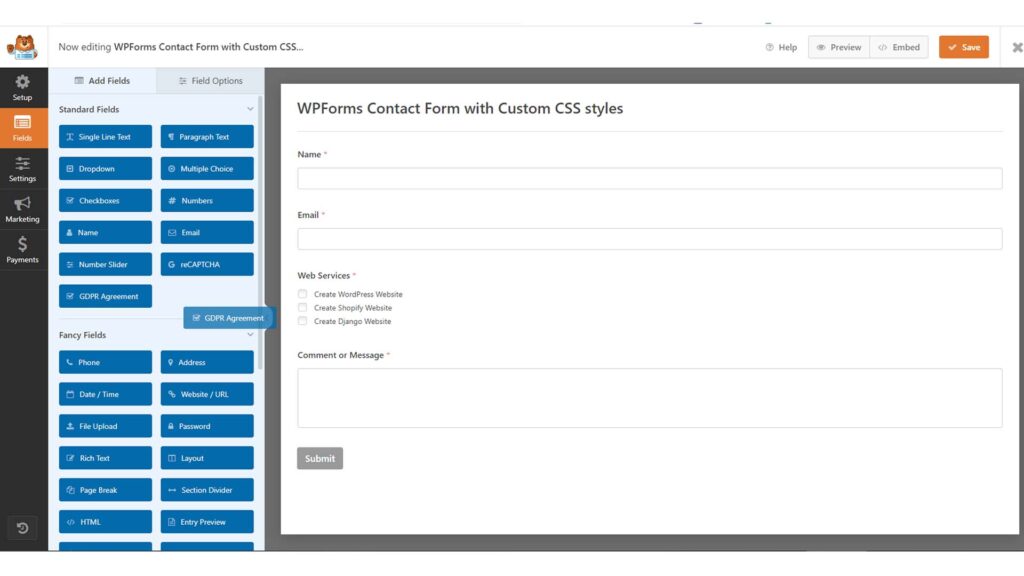
I’ve been using WPForms for a while now, and basically, it’s my plugin for creating contact forms on a WordPress website. I use it on https://www.aljunmajo.com/wp-content/uploads/2023/02/WordPress-Speed-Optimization-Made-Easy-PageSpeed-Insights-Google-Core-Web-Vitals-1.jpgmajo.com for contact forms for my services. It’s easy to use and has a lot of great features.
Our goal is to make your forms look great, so your visitors will love filling them out. I’ll cover a few different topics in this tutorial, including how to change the colors of your form, add custom CSS to your form, and style-specific form fields.
By the end of this tutorial, you’ll have a beautiful form that looks great and is easy to use.
Now, let’s get started on creating custom CSS styles for the WPForms tutorial.
Install and Activate WPForms Plugin
First, you’ll need to ensure that you have installed and activated the WPForms plugin on your website. If you don’t have the WPForms plugin installed and activated, you can download and install WPForms by going to the WordPress plugin directory website and searching WPForms, or installing the plugin by going to the WordPress admin dashboard in “Plugin > Add New.“

By the way, I purchased a WPForms yearly license(WPForm pricing), which has a few more useful features built-in. However, you can use the free version, which will work just the same.
Go to the WPForms settings dashboard
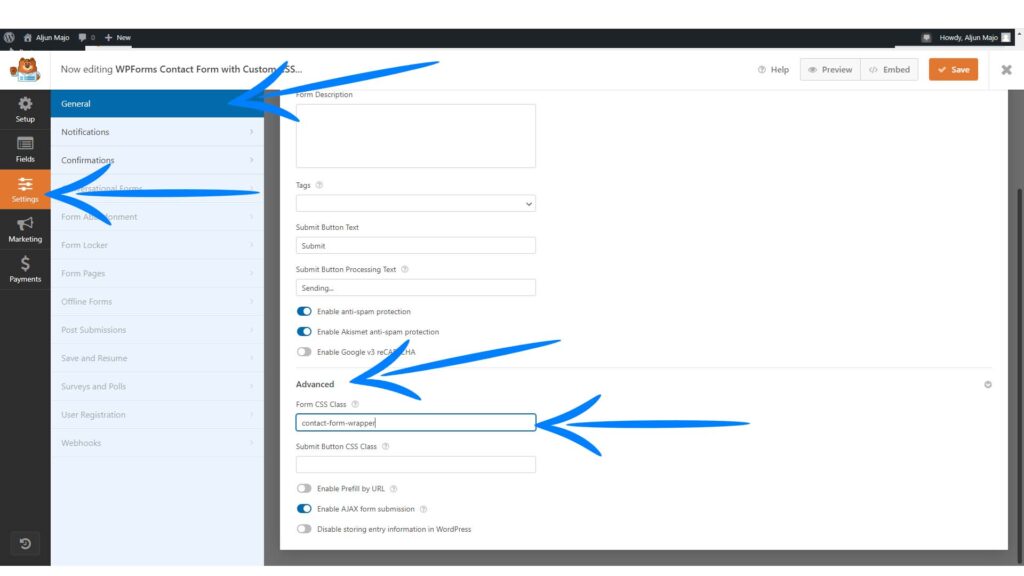
Go to the WPForms > Settings > General dashboard and find the “Advanced” section. In the “Advanced” section, you will see the “Form CSS Class” field. In this form field, “Form CSS Class,” I will add our first custom class name. I will use the class name “contact-form-wrapper.” You can use whatever you like for the custom class name, but in this tutorial, I will use the class name “contact-form-wrapper” for the form field “Form CSS Class.”
Adding Custom CSS for WPForm Form Container
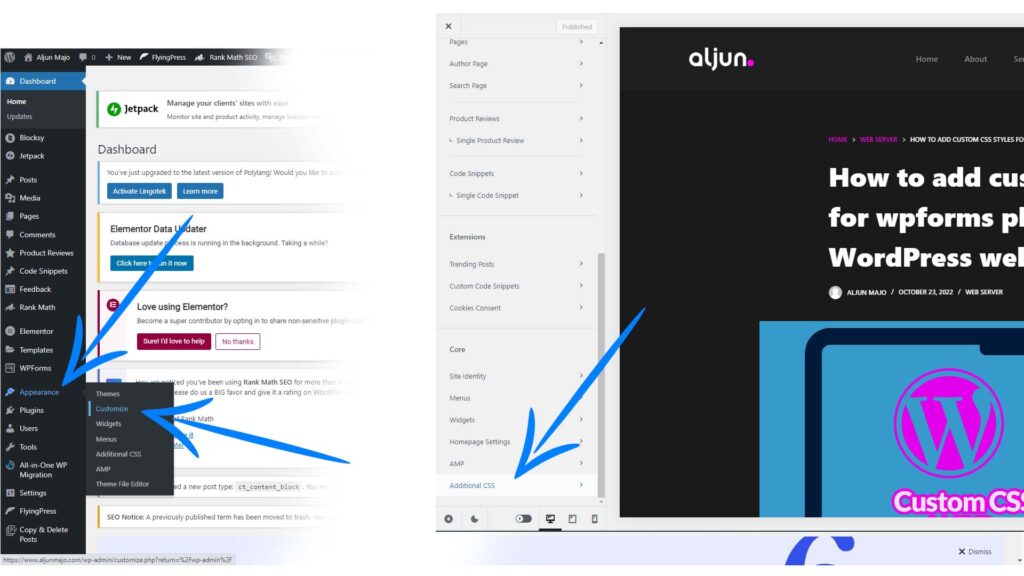
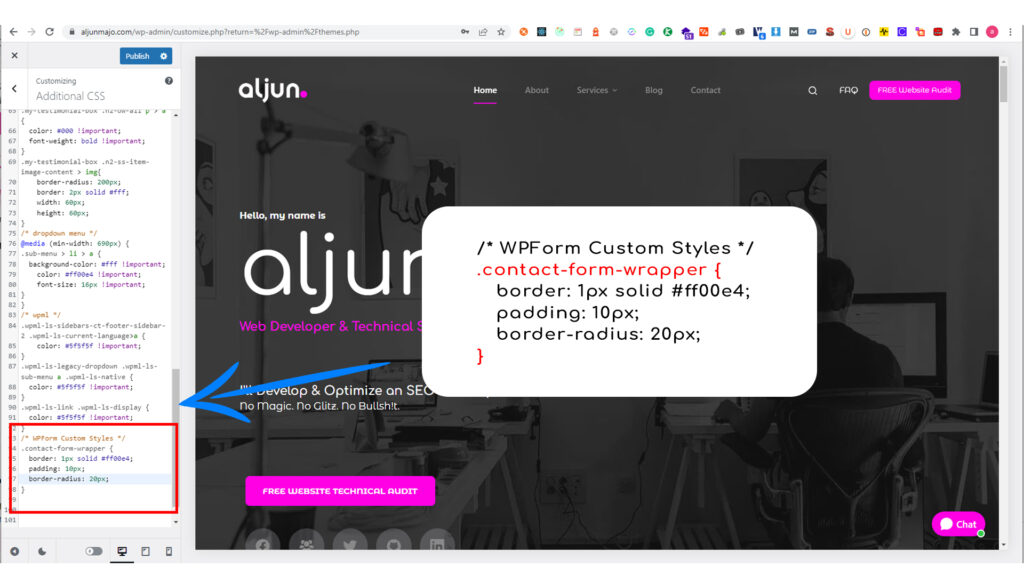
Users can add custom CSS directly to the WordPress admin dashboard by navigating the Appearance>Customize section. After clicking Customize, it will launch the WordPress theme customizer interface. Next, you will see your site’s live preview with options on the left pane. Finally, click on the Additional CSS tab from the left panel to add your custom CSS styles for the class name contact-form-wrapper created in the previous section.
After clicking the Addition CSS add these lines of CSS codes below. Refer to the screenshot below for the final looks of the section with the custom CSS styles added.
/* WPForm Custom Styles */
.contact-form-wrapper {
	border: 1px solid #ff00e4;
	padding: 10px;
	border-radius: 20px;
}
Click Publish Button to save the changes.

View the WPForm to see the custom CSS styles
To see the changes, you can navigate to your WPForm to see the new and custom CSS styles for your form wrapper that is added using this CSS class name contact-form-wrapper. If you want to see my form section with the custom CSS class added, you can click on this Sample WPForms contact form, which is the same in the screenshot below.
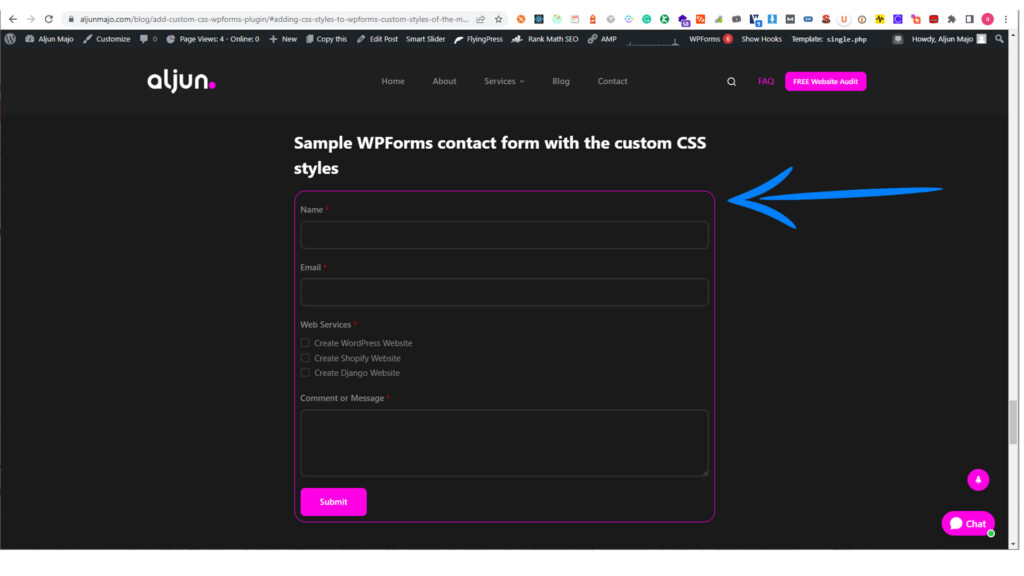
In the previous section, we added the CSS styles below. This code has 3 CSS declarations for the class name contact-form-wrapper.
/* WPForm Custom Styles */
.contact-form-wrapper {
	border: 1px solid #ff00e4;
	padding: 10px;
	border-radius: 20px;
}
border: 1px solid #ff00e4 is the box border with the magenta color

padding: 10px; is adding 10px inner space of the form

border-radius: 20px; is the round corner of the box

Adding Custom CSS for WPForm Checkbox fields
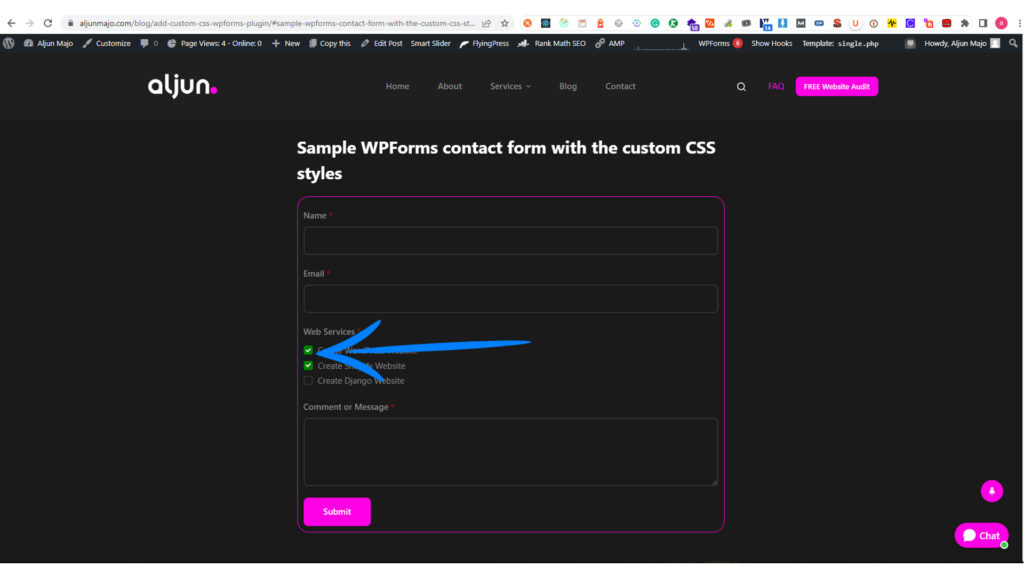
In the next example, we will add custom CSS styles for the WPForm Checkbox fields. We will change the WPForm Checkbox color from magenta to green.
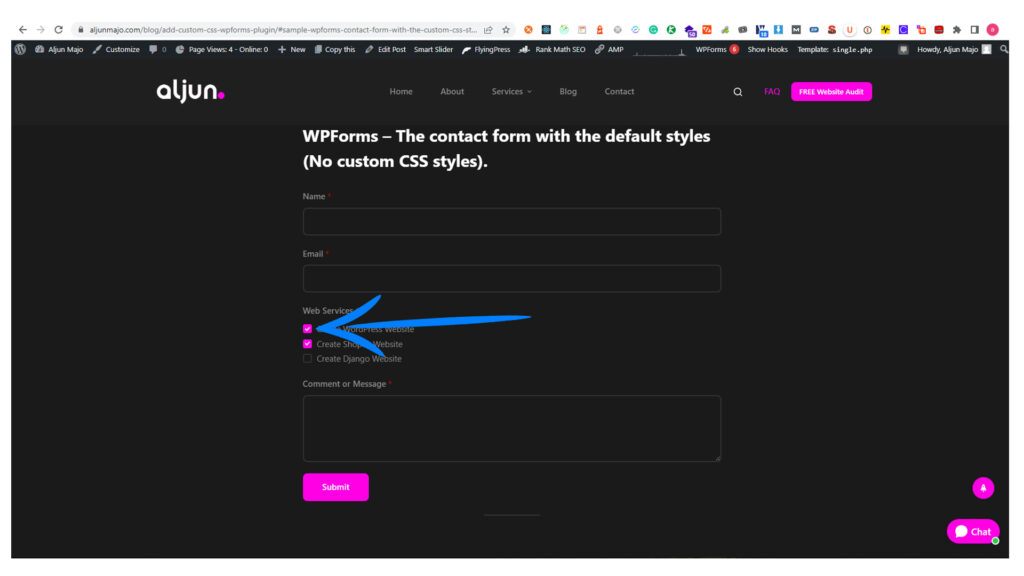
The final checkbox color looks like in the screenshot below.
Now to add the custom CSS styles for your WPForm checkbox field, you need to login into your WordPress Admin and go to WPForms > All Forms > Select the form you created.

After you click the form you created, it will display like in the screenshot below.
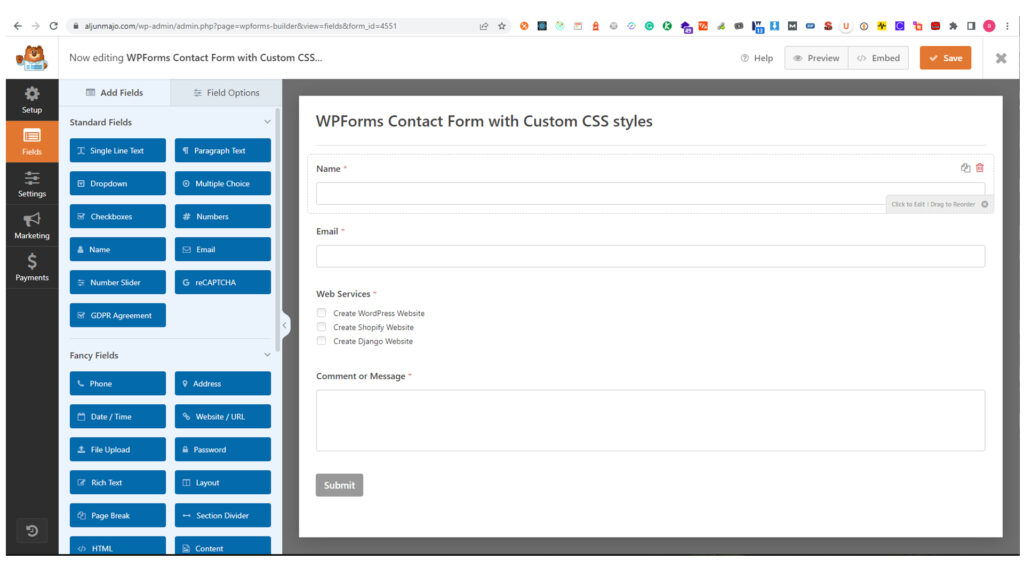
Now click the checkbox field in the form section.
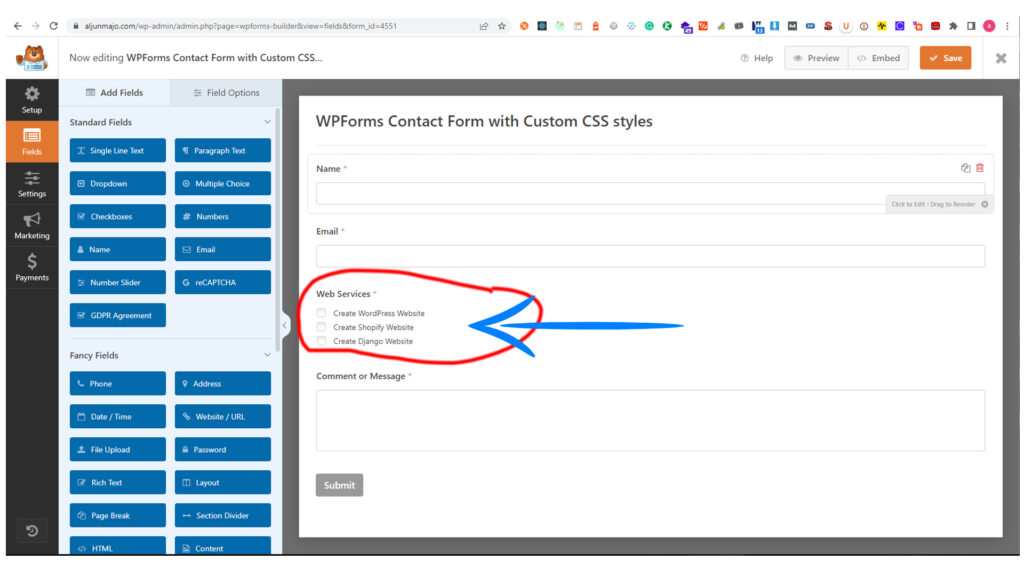
After clicking the checkbox field, go back to the left panel and see the Advanced tab, then click it. In the same panel at the lower section, find the CSS Classes input area and add this class name custom-checkbox.
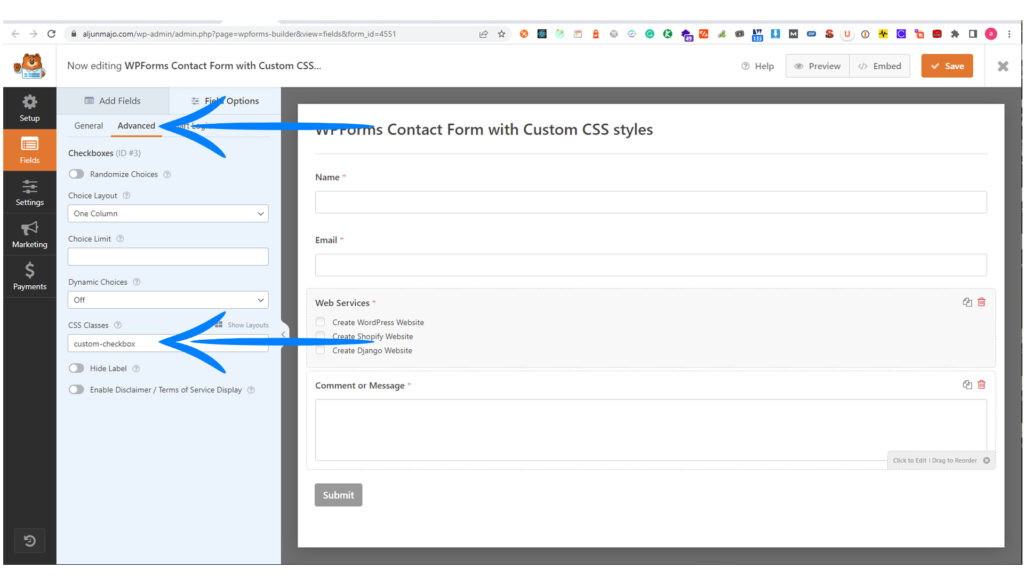
After adding the class name custom-checkbox, we need to add the CSS class name with the CSS declarations styles. In the code below, you will see this CSS class declaration “.custom-checkbox .wpforms-selected input”
.custom-checkbox is the class name that we just added in the previous section.
.wpforms-selected is the default or built-in class name of the WPForms plugin.
input is the checkbox input field where we will change the color to GREEN.
.custom-checkbox .wpforms-selected input {
  background: green !important;
  border-color: green !important;
}
In order to add these CSS styles declaration you need to log in and go to your WordPress Admin. Navigate to Appearance > Customize.

After clicking the “Customize,” find the “Addition CSS” section in the lower section of the left panel.

Now add these CSS styles for the new color of the form checkbox fields.
.custom-checkbox .wpforms-selected input {
  background: green !important;
  border-color: green !important;
}
Don’t forget to click the Publish button to save the changes and apply the new CSS styles for the WPForm checkbox input fields.

Here are the final looks for the WPForm with the custom CSS styles added for the checkbox input fields.
To see the WPForm before the CSS styles are added, click this WPForms – The contact form with the default styles (No custom CSS styles).
To see the WPForm after the CSS styles are added, click this WPForms – The contact form with the custom CSS styles
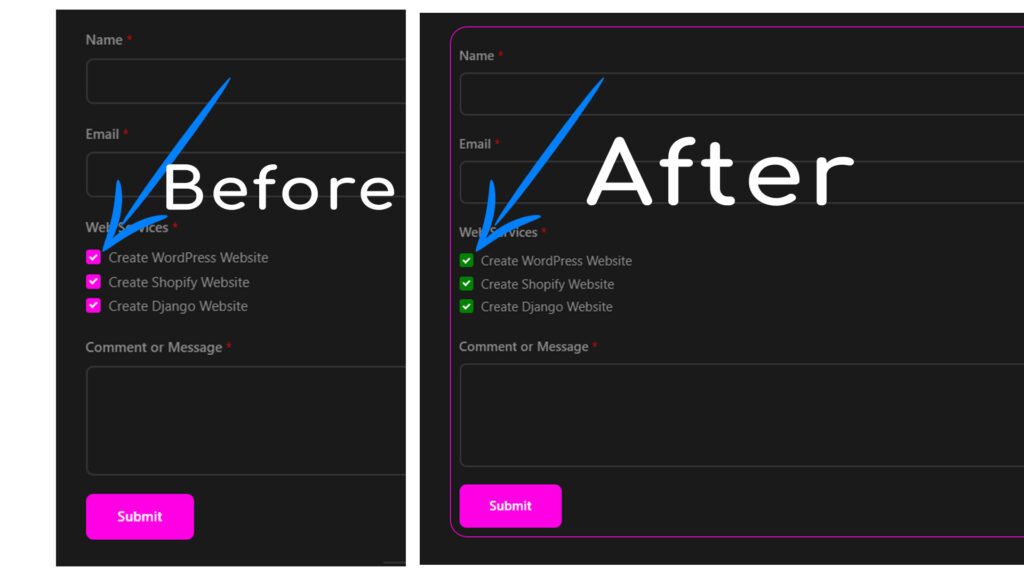
WPForms the Default CSS styles and with the Custom CSS styles
WPForms – The contact form with the default styles (No custom CSS styles).
WPForms – The contact form with the custom CSS styles
Final Thoughts on WPForm Custom CSS
Adding custom CSS styles with WordPress is simple. You can use it with a WordPress theme or another WordPress plugin, but if you don’t have basic CSS coding knowledge, such as what I have done above, you’ll have a challenging time. If you want to customize the WPForm form layout but don’t know how to do it, you better hire a web developer like me.

