Show/Hide the Password Eye Icon by using the input field with the input attribute type of a “password”
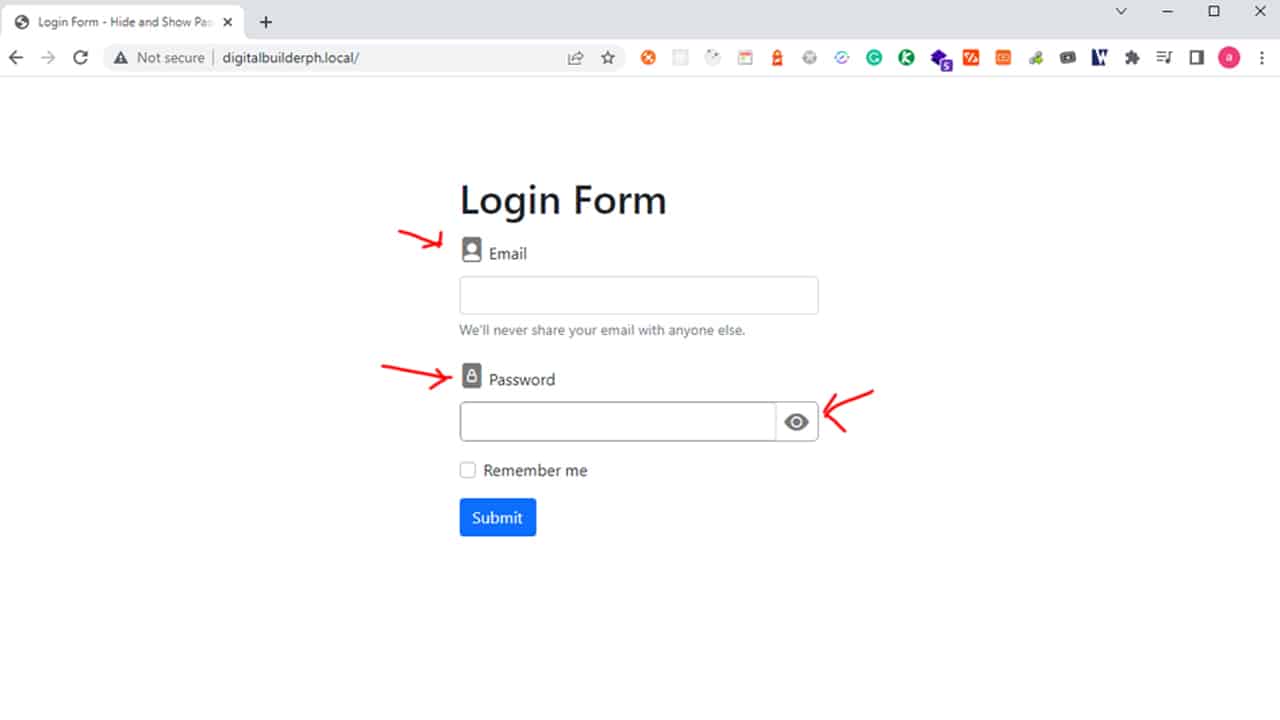
This tutorial will teach you how to use JavaScript to show/hide the password input field in the login form. I already have a basic login form, but I’m making it more user-friendly by allowing users to toggle the visibility of the password input field so they can see what they type in the login form password field. The two images below show the login form with an input field with the attribute of a password showing and hiding the input field’s value in readable password characters in a plain text format.
The Login Form with the Show/Hide Password Eye Icon I made it with the CSS Styles generated by the Bootstrap 5 CSS Framework, and the Bootstrap eye icon is also used to trigger the password input field to show or display the password character to readable text in a password input field.
Show/Hide input password that toggles between showing & hiding the password when the eye icon clicked Youtube Tutorials (Tagalog version)
Below is the login form with the email and password fields.
In the password field the asterisk (*) signs are displayed in the field.
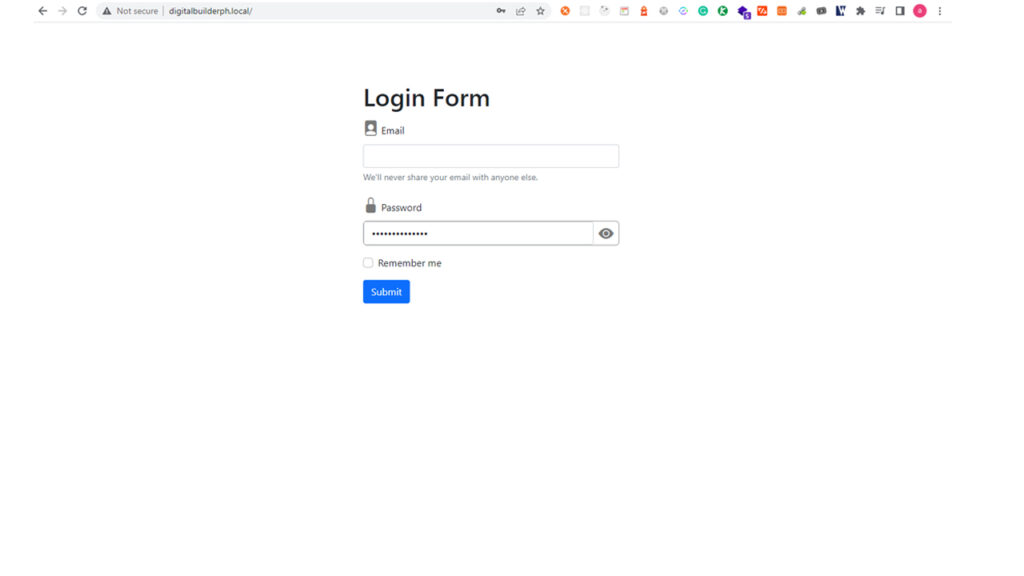
******** in the password field
Now, in the password field, the asterisk (*) signs are displayed as plain text in the field.
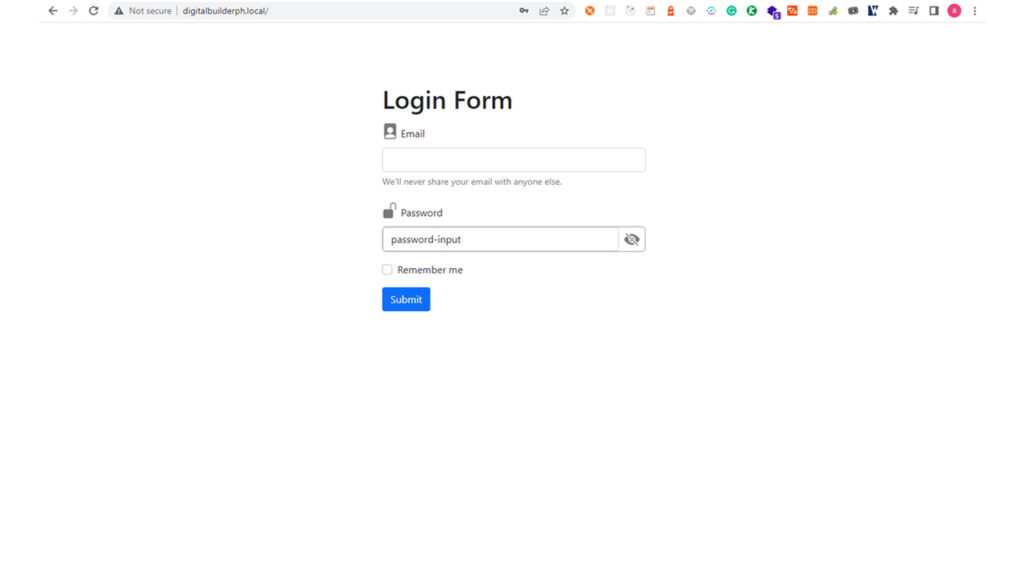
Plain text in the password field
The short video below demonstrates the login form functionality.
When the eye icon is clicked, the password is displayed as plain text. When clicked again, it returns to the asterisk sign. This is a useful feature for when you want to check your password without having to type it out.
To create this login form functionality, we will use Bootstrap version 5 and Bootstrap Icons for our HTML/CSS form layout.
The following screenshots show the login form HTML section.
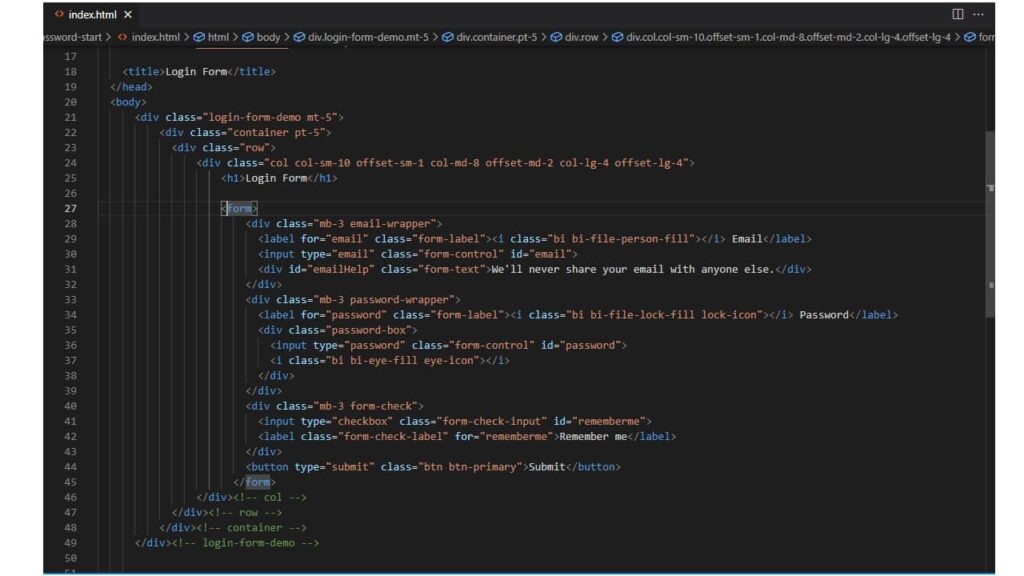
Login Form HTML Markup
You can also download the source code from this GitHub login-form-show-hide-password repository.
If you downloaded the GitHub start branch your website layout would look like in the image below.
To make the toggle functionality visibility of password input fields we will use these icons from Bootstrap Icons(see screenshots below).
We will use the bootstrap icons to make the toggle visibility work and change from asterisk signs to plain text passwords.
Login form without custom CSS styles.
In the code from the screenshot below, you need to add these lines of CSS styles to make the bootstrap icon look good. This code is in the GitHub source code, you can copy this custom.css file inside the “CSS” folder.
div.password-box {
    display: flex;
    align-items: center;
    border: solid 1px #9b9b9b;
    background-color: #fff;
    border-radius: 6px;
}
label .bi {
    font-size: 25px;
}
.password-box .bi {
    font-size: 25px;
    padding-left: 8px;
    padding-right: 8px;
}

.bi::before {
    color: #797979;
}
In the screenshot below you will see the correct login form layout after adding the custom CSS styles.
After added the custom CSS styles
Now in the JavaScript. In your HTML document file create a script link to the custom.js file. The script link to your cstuom.js file looks like this <script src="/js/custom.js"></script>.
In the code below you can copy or download from GitHub custom.js link.
const passwordIcon = document.querySelector('.eye-icon');
const lockIcon = document.querySelector('.lock-icon');
const input = document.querySelector('.password-box input');

var password = true;

passwordIcon.addEventListener('click', function(){
            if(password) {
                // change the input type attribute from "password" to "text"
                input.setAttribute('type','text');
                passwordIcon.classList.remove('bi-eye-fill');
                passwordIcon.classList.add('bi-eye-slash-fill');

                // change the lock icon beside password label
                lockIcon.classList.remove('bi-lock-fill');
                lockIcon.classList.add('bi-unlock-fill');
            } else {
                // change the input type attribute from "text" to "password"
                input.setAttribute('type','password');
                passwordIcon.classList.remove('bi-eye-slash-fill');
                passwordIcon.classList.add('bi-eye-fill');

                // change the lock icon beside password label
                lockIcon.classList.remove('bi-unlock-fill');
                lockIcon.classList.add('bi-lock-fill');
            }
        password = !password;
});
Here is the final source code that you can download at my GitHub repository https://www.aljunmajo.com/wp-content/uploads/2023/02/WordPress-Speed-Optimization-Made-Easy-PageSpeed-Insights-Google-Core-Web-Vitals-1.jpgmajo/login-form-show-hide-password
Updated content 2023 Show/Hide the Password Eye Icon Content Section
Show/Hide the Password Eye Icon by using the input field with the input attribute type of a “password.”
Add HTML code
This is the starting HTML, CSS, and JavaScript of the Show/Hide the Password Eye Icon, with the Bootstrap 5 CSS Framework as the starter HTML and CSS template for our Login Form with the eye icon bootstrap icon classes.
GitHub repo for starting file for this tutorial Show/Hide Password Eye Icon using the input field with the input attribute type of password Using the Bootstrap 5 CSS Framework and Bootstrap icon for the Form CSS Styles
The source code below is the complete HTML file based on the example I showed in the video. You can also copy or download the same HTML file on my GitHub repo.
<!doctype html>
<html lang="en">
  <head>
    <!-- Required meta tags -->
    <meta charset="utf-8">
    <meta name="viewport" content="width=device-width, initial-scale=1">


    <!-- Bootstrap CSS -->
    <link href="/css/bootstrap.css" rel="stylesheet">

    <!-- Bootstrap Icons: https://icons.getbootstrap.com/ -->
    <link rel="stylesheet" href="https://cdn.jsdelivr.net/npm/bootstrap-icons@1.8.1/font/bootstrap-icons.css">

    <!-- Custom CSS -->
    <link href="/css/custom.css" rel="stylesheet">

    <title>Login Form - Hide and Show Password</title>
  </head>
  <body>
      <div class="login-form-demo mt-5">
          <div class="container pt-5">
            <div class="row">
                <div class="col col-sm-10 offset-sm-1 col-md-8 offset-md-2 col-lg-4 offset-lg-4">
                    <h1>Login Form</h1>

                    <form>
                        <div class="mb-3 email-wrapper">
                          <label for="email" class="form-label"><i class="bi bi-file-person-fill"></i> Email</label>
                          <input type="email" class="form-control" id="email">
                          <div id="emailHelp" class="form-text">We'll never share your email with anyone else.</div>
                        </div>
                        <div class="mb-3 password-wrapper">
                          <label for="password" class="form-label"><i class="bi bi-file-lock-fill lock-icon"></i> Password</label>
                          <div class="password-box">
                            <input type="password" class="form-control" id="password">
                            <i class="bi bi-eye-fill eye-icon"></i>
                          </div>
                        </div>
                        <div class="mb-3 form-check">
                          <input type="checkbox" class="form-check-input" id="rememberme">
                          <label class="form-check-label" for="rememberme">Remember me</label>
                        </div>
                        <button type="submit" class="btn btn-primary">Submit</button>
                      </form>
                </div><!-- col -->
            </div><!-- row -->
          </div><!-- container -->
      </div><!-- login-form-demo -->


    <!-- Optional JavaScript; choose one of the two! -->

    <!-- Option 1: Bootstrap Bundle with Popper -->
    <script src="/js/bootstrap.js"></script>
    <script src="/js/custom.js"></script>

    <!-- Option 2: Separate Popper and Bootstrap JS -->
    <!--
    <script src="https://cdn.jsdelivr.net/npm/@popperjs/core@2.9.2/dist/umd/popper.min.js" integrity="sha384-IQsoLXl5PILFhosVNubq5LC7Qb9DXgDA9i+tQ8Zj3iwWAwPtgFTxbJ8NT4GN1R8p" crossorigin="anonymous"></script>
    <script src="https://cdn.jsdelivr.net/npm/bootstrap@5.0.2/dist/js/bootstrap.min.js" integrity="sha384-cVKIPhGWiC2Al4u+LWgxfKTRIcfu0JTxR+EQDz/bgldoEyl4H0zUF0QKbrJ0EcQF" crossorigin="anonymous"></script>
    -->
  </body>
</html>
Add JavaScript Code to target or retrieve the HTML elements
JavaScript code needs to add to the javascript file called custom.js inside the “JS” folder to target or retrieve the HTML elements that need to be changed when the eye icon is clicking
const passwordIcon = document.querySelector('.eye-icon');
const lockIcon = document.querySelector('.lock-icon');
const input = document.querySelector('.password-box input');
Add JavaScript Click Events
To change the password to a readable text we need to add another JavaScript code to capture the event when the “eye” icon is clicked. So when there are events like clicking the “eye” icon the JavaScript below will capture the events and change the eye icon and the lock icon.
var password = true;

passwordIcon.addEventListener('click', function(){
            if(password) {
                // using the javascript dynamically changed the INPUT element type attribute from password to text
                input.setAttribute('type','text');
                passwordIcon.classList.remove('bi-eye-fill');
                passwordIcon.classList.add('bi-eye-slash-fill');

                lockIcon.classList.remove('bi-lock-fill');
                lockIcon.classList.add('bi-unlock-fill');
            } else {
                // using the javascript dynamically changed the INPUT element type attribute from text to password
                input.setAttribute('type','password');
                passwordIcon.classList.remove('bi-eye-slash-fill');
                passwordIcon.classList.add('bi-eye-fill');

                lockIcon.classList.remove('bi-unlock-fill');
                lockIcon.classList.add('bi-lock-fill');
            }
        password = !password;
});
Add CSS styles to make the layout look more beautiful
Through the codes I gave above, all the functionality for hiding or showing the password as the text will work, but we need some CSS styles to position the eye icon nicely. The CSS code below is for custom CSS styles to make eye icon placement more beautiful.
div.password-box {
    display: flex;
    align-items: center;
    border: solid 1px #9b9b9b;
    background-color: #fff;
    border-radius: 6px;
}
label .bi {
    font-size: 25px;
}
.password-box .bi {
    font-size: 25px;
    padding-left: 8px;
    padding-right: 8px;
}

.bi::before {
    color: #797979;
}
The video below is the full functionality of how I did it that I recorded using video and here is the complete GitHub source code for my Show/Hide Password Eye Icon.
If you know HTML, CSS, and JavaScript or have experience as a Web Developer, you can easily implement this functionality in your website, the Show/Hide Password Eye Icon for your login form and password field. However, suppose you have difficulty implementing this Show/Hide Password Eye Icon functionality. In that case, you can contact me and hire me to create the Show/Hide Password Eye Icon for your login form, as shown above, or you can buy me a coffee, and I will do your Show/Hide Password Eye Icon for your login form and password field.


Magandang Tutorial ito simple Login Form na ma ipakita ang password field. May youtube video ka para dito?
Oo gagawan ko ito ng youtube video para mas madali at maipaliwanag ko ng mabuti.
Ito ang “Show/Hide input password that toggles between showing & hiding the password when eye icon clicked” tagalog version na youtube video https://youtu.be/nafXr8oZPOE